I love my MacBooks, but it’s well recognised that they never come with enough storage (unless you have very deep pockets). Meanwhile medical datasets keep growing in size, so trying to do any kind of real analysis on your own laptop is impossible despite the ludicrous amount of processing power than even a MacBook Air packs these days.
Luckily additional SSD storage is (relatively) very cheap these day. I picked up a 4TB Sandisk Extreme for a fraction of the cost of a 1TB internal drive, and 3D printed a mount to stick on the back of the screen so I don’t lose it.
But the practicalities of getting these datasets running was less straightforward… So hopefully this write up of my experience will help you avoid the same pitfalls.
Step 1: Get PostgreSQL running
PostgreSQL or Postgres is a FOSS relational database. A lot of commonly used datasets (in my practice, MIMIC and AmsterdamUMCdb for example) have scripts to install their gigabytes of data into a local instance of Postgres, so let’s use that.

Although Postgres recommend the EDB installer, I and others have had plenty of trouble with this. The most straightforward way to get it runnning is Postgres.app, a native Mac app which also installs all the command line tools at the same time:
- Get the latest release, open the
.dmg, and drag it intoApplicationslike you would any other Mac app. - When you run it for the first time, it’ll initialise a cluster at
~/Library/Application Support/Postgres/var-18/(replace 18 with whichever version you’ve downloaded). - Click Start Server to run it
The next step is getting the command line tools running properly. The official docs are wrong - for newer Macs you need to run the following in terminal:
echo 'export PATH="/Applications/Postgres.app/Contents/Versions/latest/bin:$PATH"' >> ~/.zshrc
source ~/.zshrc
Verify this by running which psql, which should return /Applications/Postgres.app/Contents/Versions/latest/bin/psql.
Step 2: Format your SSD
PostgreSQL needs a fully POSIX-compliant filesystem. The SSDs tend to come formatted as exFAT which allows compatibility with Macs and PCs alike, but this doesn’t provide the filesystem guarantees (like permissions, hard links, atomic fsync) that a relational database depends on. So we’ll need to reformat that SSD:
- Back up anything that’s on it! Reformatting will delete all data
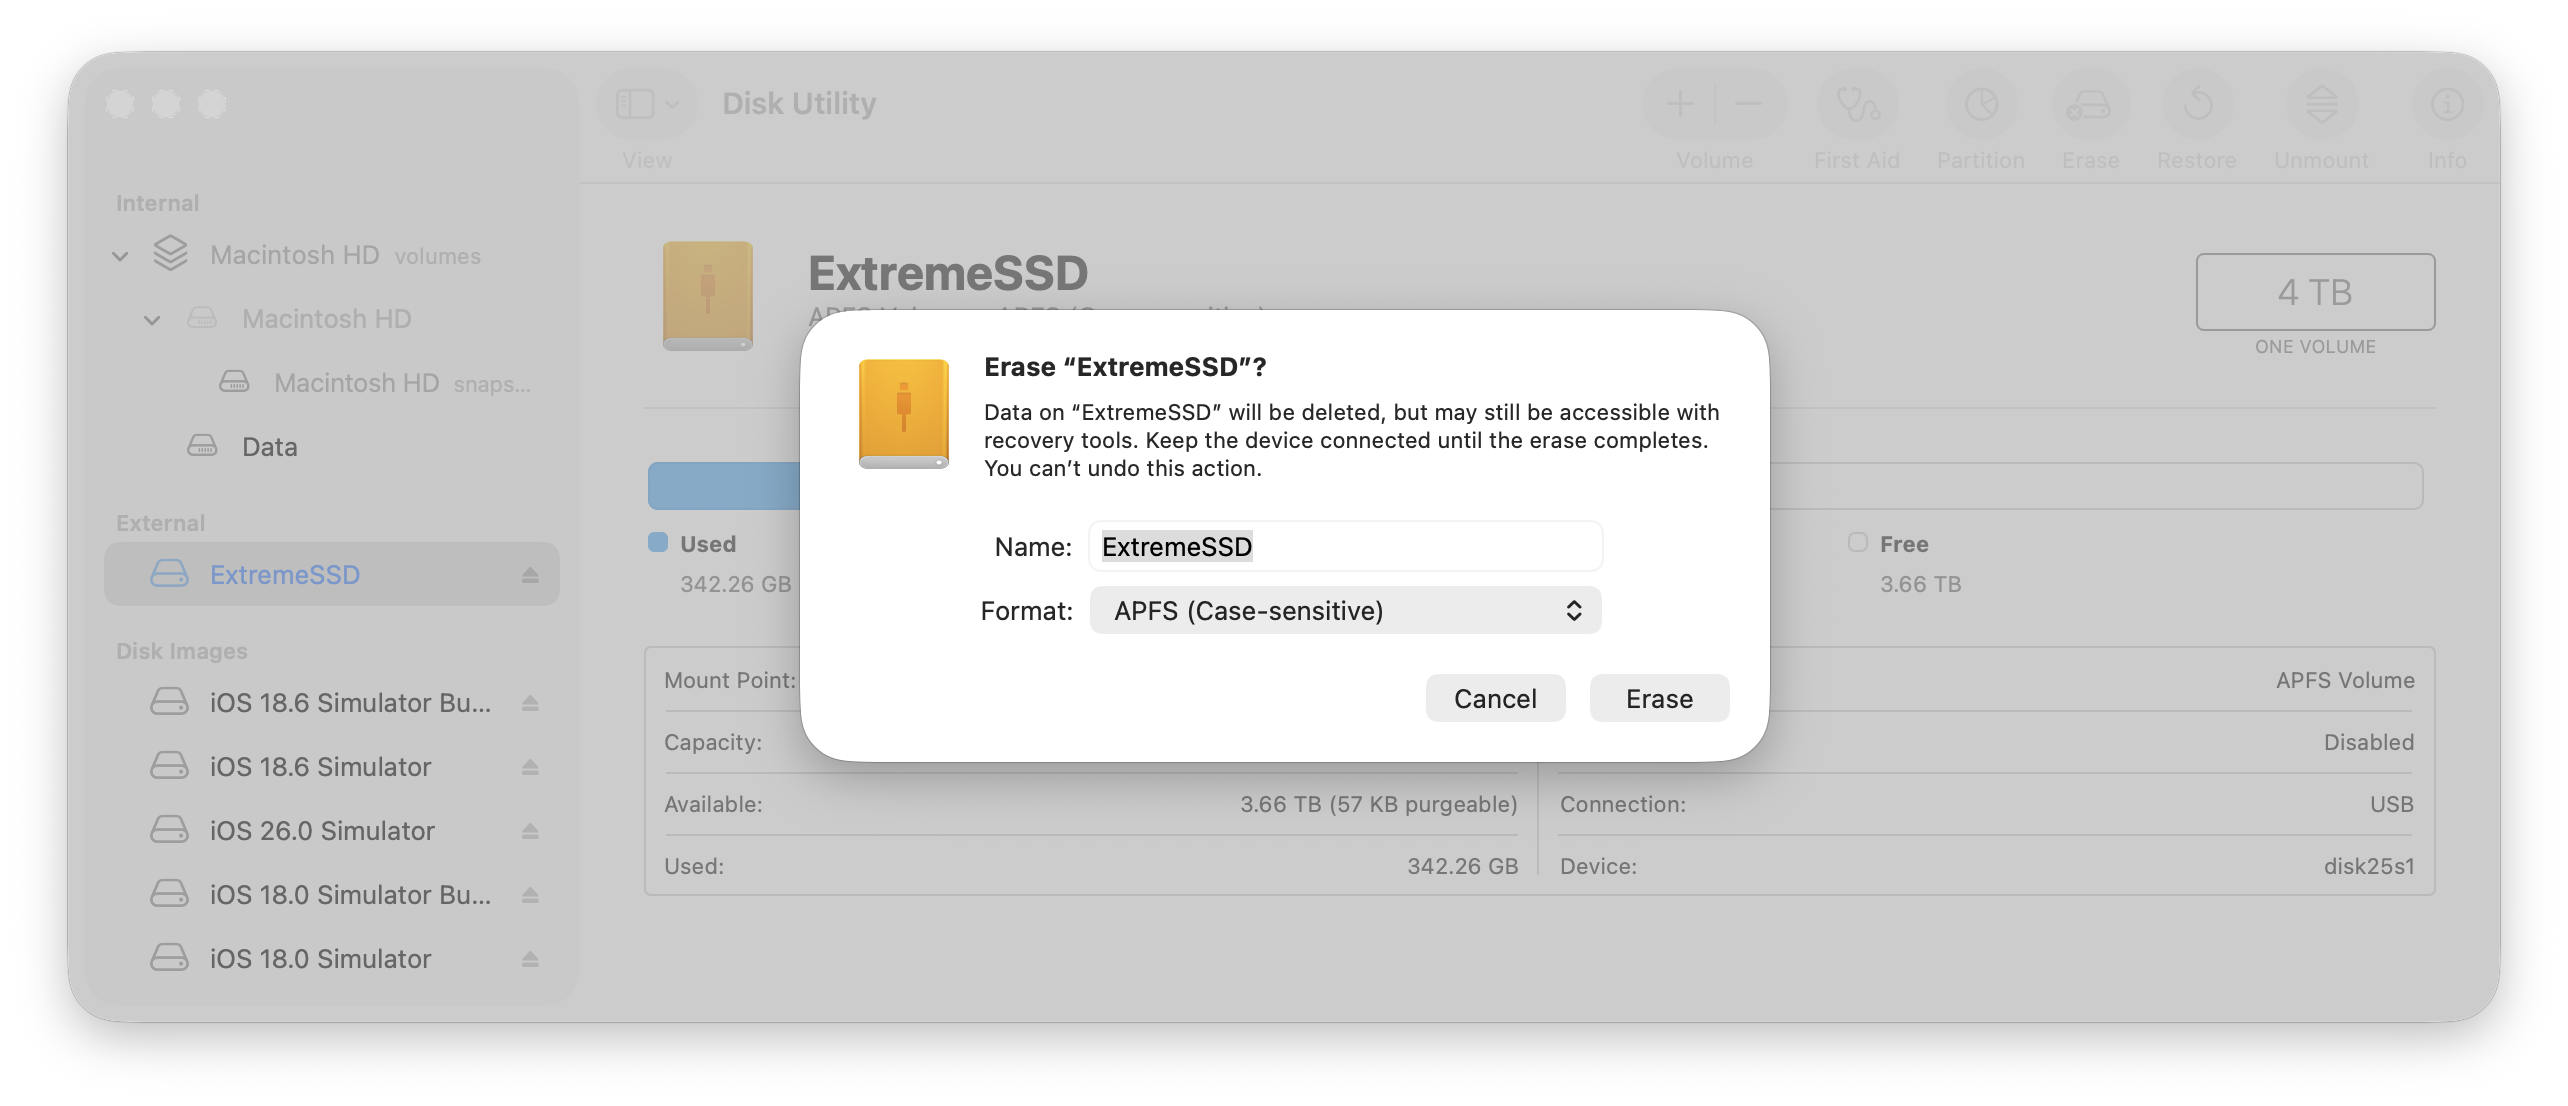
- Open Disk Utility and select the external SSD. Hit Erase, and a window will open with options like below. Format as “APFS (Case-sensitive)”, give it an easy to type name (for all the following examples I’m assuming
ExtremeSSD), and click Erase
Step 3: Move the Postgres database
We need to halt the existing server, then move everything:
- Stop the server from the menu bar using Postgres.app (or
pg_ctl -D ~/Library/Application\ Support/Postgres/var-18 stop) - Copy the existing data directory to the SSD with
rsync -av ~/Library/Application\ Support/Postgres/var-18/ /Volumes/ExtremeSSD/postgres/ - Back up the original (to be on the safe side) with
mv ~/Library/Application\ Support/Postgres/var-18 ~/Library/Application\ Support/Postgres/var-18-backup - Finally, create a symbolic link so Postgres.app still “thinks” the data is in the same spot using
ln -s /Volumes/ExtremeSSD/postgres ~/Library/Application\ Support/Postgres/var-18
Open Postgres.app again, and hit Start Server. If your previous databases appear, you can check they’re running from the SSD with psql -U postgres -d postgres -c "SHOW data_directory;", which should return /Volumes/ExtremeSSD/postgres.

If it’s all worked, clean up your backup with rm -rf ~/Library/Application\ Support/Postgres/var-18-backup.
Step 4: Optimise the Postgres configuration
This is optional, but the default configuration used by Postgres.app is very conservative. A MacBook Air can safely handle far larger buffers and faster parallel execution, so we can edit this with nano ~/Library/Application\ Support/Postgres/var-18/postgresql.conf and edit the following lines to be something like:
# Memory and caching
shared_buffers = 4GB              # ~25% of RAM; good caching without starving macOS
effective_cache_size = 10GB       # planner hint: assumes OS+Postgres cache
work_mem = 64MB                   # per sort/hash; OK for analytical workloads
maintenance_work_mem = 1GB        # used by CREATE INDEX, VACUUM, etc.
temp_buffers = 32MB

# WAL, checkpoints & background writes
wal_level = replica               # default; 'logical' if you need logical decoding
max_wal_size = 2GB
min_wal_size = 512MB
checkpoint_timeout = 15min
checkpoint_completion_target = 0.9
synchronous_commit = on

# Parallelism (my M3 has 8 cores)
max_worker_processes = 8
max_parallel_workers = 8
max_parallel_workers_per_gather = 4
parallel_leader_participation = on

# I/O for SSD
random_page_cost = 1.1
effective_io_concurrency = 200

# Monitoring
log_min_duration_statement = 500      # log queries >0.5 s
log_checkpoints = on
log_autovacuum_min_duration = 0

# Tuning
autovacuum_vacuum_cost_limit = 2000
autovacuum_max_workers = 4

# Connections (single-user so saves memory)
max_connections = 20
Save and reload the server in the app (or use pg_ctl -D /Volumes/ExtremeSSD/postgres reload)
Step 5: Use all your new found space!
All the database should be inside the /postgres folder on your SSD, so feel free to use the additional space for other media. Personally I pull down data to be imported onto the SSD (given one of the AmsterdamUMCdb tables expands into an 80Gb CSV file alone), and run them from there. Good luck!